 Skip to content
 Container Workshop Plans: Innovative Designs for Modern Makers
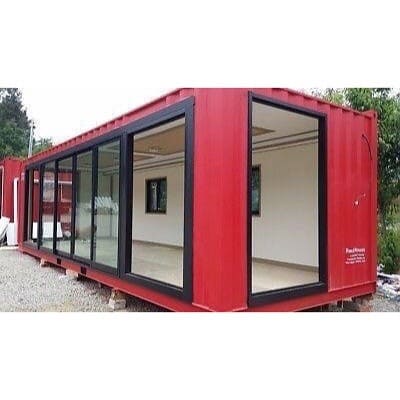
Container Workshop Plans provide a practical pathway for hobbyists, artisans, and small‑business owners who crave a dedicated, portable workspace without the expense of traditional construction. By converting a shipping container into a functional workshop, you gain durability, mobility, and a canvas for endless customization. This guide walks you through every phase—from initial concept to final finishes—so you can confidently build a workshop that meets your exact needs.
Key Takeaways
- Container Workshop Plans combine structural strength with modular flexibility.
- Proper insulation, ventilation, and electrical wiring are non‑negotiable for comfort and safety.
- Budgeting for foundation work, permits, and interior finishes prevents costly surprises.
- Custom features such as fold‑down workbenches, overhead storage, and solar panels boost usability.
- Regular maintenance—rust treatment, seal checks, and lubrication—extends the container’s lifespan.
Why Choose a Container Workshop?
Furthermore, the rise of urban maker culture has amplified demand for spaces that can be relocated as needs evolve. A Container Workshop Plans approach offers a steel‑shell core that resists pests, fire, and extreme weather, providing peace of mind for valuable tools and materials. Moreover, the standardized dimensions of containers simplify layout planning, allowing you to replicate successful designs across multiple sites.
In addition, the environmental benefit of repurposing a used container reduces construction waste and lowers the carbon footprint associated with new builds. Consequently, many municipalities view container‑based projects favorably during the permitting process, especially when sustainable practices are highlighted.
Therefore, whether you are a woodworker seeking a dust‑controlled environment, a metal fabricator needing heavy‑duty flooring, or an artist craving a bright, insulated studio, a container workshop delivers a versatile foundation that can be tailored to any trade.
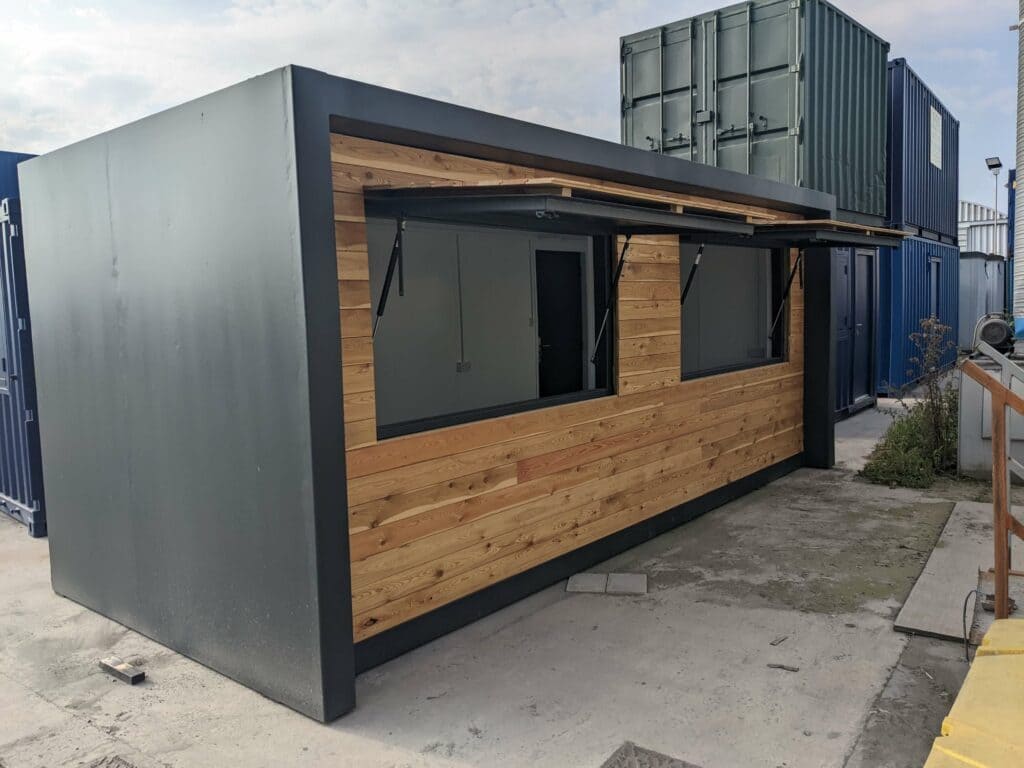
Core Benefits of Container Workshop Plans
Additionally, the inherent strength of corten steel means the structure can support heavy equipment such as CNC mills, welding rigs, or automotive lifts without supplemental framing. This load‑bearing capacity translates directly into cost savings, as you avoid extra steel beams or reinforced concrete foundations.
Furthermore, the modular nature of containers enables easy expansion; you can join two or more units side‑by‑side or stack them vertically to create multi‑level workspaces. As a result, your workshop can grow alongside your business, adapting to increased inventory or new production lines.
Moreover, the portable aspect allows you to relocate the workshop to a job site, a farmer’s market, or a temporary event venue, providing income‑generating flexibility that fixed‑location workshops cannot match.
Container Workshop Plans: Core Concepts and Benefits
Container Workshop Plans: Essential Tools and Materials
Furthermore, before diving into design sketches, assemble a checklist of essential tools and materials that will streamline the build process. Having the right equipment on hand reduces delays and ensures each step meets quality standards.
Moreover, a well‑prepared inventory list helps you budget accurately, preventing unexpected trips to the hardware store mid‑project. Consequently, you maintain momentum and keep labor costs predictable.
Therefore, consider the following categories when preparing for your Container Workshop Plans execution:
- Cutting and welding gear (angle grinder, plasma cutter, MIG welder)
- Measuring and layout tools (laser measure, speed square, chalk line)
- Fastening hardware (self‑tapping screws, bolts, rivets, structural adhesive)
- Insulation materials (spray foam, rigid board, reflective barriers)
- Electrical supplies (conduit, breaker panel, wiring, outlets, lighting fixtures)
- Finishing products (paint, primer, sealant, flooring underlayment)
In addition, safety equipment such as respirators, ear protection, and fire extinguishers must be readily available throughout the build. As a result, you protect yourself and any helpers from hazards inherent to metalwork and electrical installation.
Furthermore, sourcing a used container in good condition is critical; inspect for rust, dents, and proper door seals before purchase. Moreover, verify that the container’s CSC (Container Safety Convention) plate is valid, ensuring it meets international shipping standards.
Consequently, a solid foundation begins with a container that is structurally sound, reducing the need for extensive repairs later.

Designing Your Container Workshop Layout
Furthermore, effective layout planning starts with a clear understanding of your workflow. Sketch zones for material storage, fabrication, finishing, and cleaning, ensuring each area flows logically into the next.
Moreover, consider ergonomics: place frequently used tools within easy reach, position workbenches at comfortable heights, and allocate ample clearance for moving large pieces.
Therefore, a well‑thought‑out floor plan minimizes unnecessary steps, boosts productivity, and reduces fatigue during long sessions.
In addition, incorporate vertical storage solutions such as wall‑mounted racks, pegboards, and overhead cranes to keep the floor uncluttered. Consequently, you maximize usable square footage without expanding the container’s footprint.
Furthermore, think about future flexibility; install removable partitions or modular cabinets that can be reconfigured as your projects evolve.
As a result, your workshop remains adaptable, accommodating new equipment or changes in production focus.
Insulation and Climate Control
Furthermore, steel containers conduct heat and cold efficiently, making insulation a vital component of any Container Workshop Plans. Without proper thermal barriers, interior temperatures can swing dramatically, affecting both comfort and material integrity.
Moreover, select insulation with a high R‑value per inch to maximize performance within the limited wall cavity. Spray foam offers seamless coverage and acts as an air barrier, while rigid foam boards provide consistent R‑values and are easier to install DIY.
Therefore, combine insulation types where beneficial—spray foam for corners and seams, rigid board for flat walls—to achieve optimal thermal performance.
In addition, install a vapor barrier on the warm side of the insulation to prevent condensation, which can lead to rust and mold growth.
Consequently, a dry, stable interior environment protects both your tools and finished workpieces.
Furthermore, climate control extends beyond insulation; consider integrating an HVAC system, portable heater, or evaporative cooler based on your local climate.
Moreover, a mini‑split heat pump offers both heating and cooling with high energy efficiency, making it a popular choice for container workshops.
Therefore, size the unit according to the container’s square footage and insulation level, ensuring it can maintain desired temperatures without excessive energy consumption.
As a result, you create a comfortable workspace usable year‑round, increasing productivity and expanding the range of projects you can undertake.
Electrical and Plumbing Considerations
Furthermore, a reliable electrical system powers lighting, tools, and any specialized equipment you plan to install. Begin by calculating your total load: sum the wattage of all devices, then add a 20 % safety margin for future expansion.
Moreover, route conduit through the container’s corrugated walls using surface‑mounted raceways or by drilling sleeved holes that preserve structural integrity.
Therefore, a sub‑panel with appropriately rated breakers isolates workshop circuits from the main supply, enhancing safety and simplifying troubleshooting.
In addition, install GFCI outlets in areas prone to moisture, such as near sinks or wet‑sanding stations, to protect against shock hazards.
Consequently, a well‑designed electrical layout supports both everyday tasks and high‑draw equipment like welders or air compressors.
Furthermore, if your workshop requires plumbing—for a sink, compressed air lines, or a small bathroom—plan the routing early to avoid cutting through finished walls later.
Moreover, use PEX tubing for water lines due to its flexibility and resistance to corrosion, and install shut‑off valves at accessible points for maintenance.
Therefore, slope drain lines correctly and incorporate a vent stack to prevent sewer gases from entering the workspace.
As a result, you achieve a functional, code‑compliant plumbing system that adds convenience without compromising safety.
Flooring and Workbench Options
Furthermore, the floor bears the brunt of heavy loads, impacts, and spills, so selecting the right material is essential for durability and safety. Epoxy‑coated concrete provides a seamless, chemical‑resistant surface that withstands oil, solvents, and dropped tools.
Moreover, interlocking rubber tiles offer shock absorption, reducing fatigue during long standing periods and providing a non‑slip surface even when wet.
Therefore, consider a hybrid approach: epoxy in the primary work zone for easy cleanup, and rubber tiles in areas where you spend extended time on your feet.
In addition, elevate workbenches on sturdy frames to create under‑bench storage for bins, casters, or small parts organizers.
Consequently, you keep the floor clear while maximizing storage capacity.
Furthermore, choose bench tops made from hardwood, stainless steel, or phenolic resin based on the nature of your work—wood for fine craftsmanship, metal for welding, and resin for chemical resistance.
Moreover, integrate power strips and data ports directly into the bench design to keep cords organized and accessible.
As a result, your workbench becomes a central hub that enhances efficiency and safety.
Ventilation and Safety Features
Furthermore, adequate ventilation removes fumes, dust, and particulates generated by sanding, painting, welding, and laser cutting. Install a combination of passive vents—such as louvered openings—and active exhaust fans to maintain air exchange rates that meet OSHA guidelines.
Moreover, position intake vents low and exhaust vents high to encourage natural convection, reducing the load on mechanical systems.
Therefore, a balanced ventilation strategy improves air quality, protects respiratory health, and helps regulate temperature.
In addition, install fire suppression equipment appropriate to the hazards present: a Class ABC extinguisher for general use, and a Class D extinguisher if you work with combustible metals.
Consequently, you are prepared to respond quickly to incipient fires, minimizing damage and risk of injury.
Furthermore, incorporate emergency shut‑off switches for power and gas supplies, clearly labeled and reachable from multiple points in the workshop.
Moreover, consider installing a first‑aid kit, eyewash station, and spill containment kits to address common workshop accidents.
As a result, you create a safer environment that encourages confidence and focus on creative tasks.
Cost Estimation and Budgeting
Furthermore, developing a realistic budget prevents project stalls and helps you prioritize essential upgrades. Begin by itemizing major cost categories: container purchase, site preparation, foundation, insulation, electrical, plumbing, interior finishes, and labor.
Moreover, obtain multiple quotes for each service to ensure competitive pricing and identify potential savings opportunities.
Therefore, allocate a contingency fund of 10‑15 % of the total estimate to cover unforeseen expenses such as hidden rust or permit fees.
In addition, track expenses in a spreadsheet or budgeting app, updating it regularly as purchases are made and invoices arrive.
Consequently, you maintain financial visibility and can adjust plans proactively before overruns occur.
Furthermore, explore financing options such as equipment loans, lines of credit, or small‑business grants aimed at makerspaces and artisan studios.
Moreover, some municipalities offer tax incentives or fee waivers for projects that incorporate sustainable practices like container reuse.
Therefore, research local programs early in the planning phase to maximize potential offsets.
As a result, you can stretch your budget further while still achieving a high‑quality workshop.
Permits and Legal Requirements
Furthermore, navigating the permitting process is a critical step that varies by jurisdiction. Begin by contacting your local building department to determine whether a container workshop qualifies as an accessory structure, a temporary building, or requires a change‑of‑use permit.
Moreover, provide detailed Container Workshop Plans that include site plans, structural calculations, insulation details, and electrical schematics to facilitate review.
Therefore, clear, professional documentation accelerates approval and reduces the likelihood of costly revisions.
In addition, verify zoning restrictions concerning setbacks, height limits, and permissible uses; some areas prohibit industrial activities in residential zones.
Consequently, you may need to apply for a variance or consider locating the workshop in a commercially zoned parcel.
Furthermore, ensure compliance with fire codes, especially if you plan to store flammable materials or operate welding equipment.
Moreover, install smoke detectors and consider a fire alarm system linked to a monitoring service for added protection.
As a result, you meet legal obligations while safeguarding your investment and the surrounding community.
Step‑by‑Step Build Guide
Furthermore, breaking the build into manageable phases helps maintain momentum and ensures quality control at each stage. The following outline provides a high‑level roadmap that you can adapt to your specific Container Workshop Plans.
Moreover, always begin with a thorough safety briefing and verify that all tools are in good working order before starting work.
Therefore, Phase 1 – Site Preparation: the area, level the ground, and lay a suitable foundation (concrete piers, slab, or gravel pad) based on soil conditions and load requirements.
In addition, install anchor points or tie‑downs to secure the container against wind or seismic forces.
Consequently, a stable foundation prevents shifting that could compromise doors, windows, and interior finishes.
Furthermore, Phase 2 – Container Placement: Use a crane or forklift to position the container onto the foundation, ensuring it is square and level.
Moreover, shim any low spots with steel plates or grout to achieve uniform support across the container’s base.
Therefore, verify door operation and seal integrity before proceeding to modifications.
In addition, cut openings for doors, windows, and utility penetrations using a plasma cutter or angle grinder, following the layout marked on the exterior.
Consequently, clean edges and apply primer to exposed metal to inhibit rust formation.
Furthermore, Phase 3 – Framing and Insulation: If you plan to add interior stud walls for added rigidity or to run services, install lightweight steel or wood framing inside the container.
Moreover, spray foam or rigid board insulation should be applied to walls, ceiling, and floor cavities, sealing all gaps to create a continuous thermal envelope.
Therefore, install a vapor barrier on the warm side of the insulation before covering with interior sheathing such as plywood or drywall.
In addition, seal seams with tape or acoustic caulk to enhance airtightness.
Consequently, you achieve a comfortable interior environment that resists moisture intrusion.
Furthermore, Phase 4 – Electrical and Plumbing Rough‑In: Run conduit, pull wires, and install boxes according to your electrical plan.
Moreover, lay PEX tubing for water lines and PVC for drain lines, ensuring proper slope and support.
Therefore, schedule inspections with the local authority having jurisdiction (AHJ) before concealing any work.
In addition, label all circuits and valves clearly for future reference.
Consequently, rough‑in approval prevents costly rework later.
Furthermore, Phase 5 – Interior Finishes: Hang drywall, apply tape and mud, sand smooth, and prime surfaces ready for paint.
Moreover, install flooring—epoxy coating, rubber tiles, or sealed concrete—according to the manufacturer’s instructions.
Therefore, mount workbenches, shelving, and storage units, anchoring them securely to the floor or walls.
In addition, hang lighting fixtures, install outlets, and connect appliances to verify functionality.
Consequently, the space begins to resemble a functional workshop ready for equipment move‑in.
Furthermore, Phase 6 – Final Systems and Commissioning: Activate the HVAC system, test exhaust fans, and verify that all GFCI outlets trip correctly.
Moreover, run a performance check on major tools (welder, compressor, CNC) to ensure adequate power and ventilation.
Therefore, adjust thermostat settings, balance airflows, and calibrate any automated controls.
In addition, conduct a thorough walk‑through with a checklist to identify any punch‑list items.
Consequently, once all items are resolved, you can declare the workshop operational and begin projects.
Customization Ideas and Inspiration
Furthermore, the true power of Container Workshop Plans lies in the ability to tailor every inch to your creative vision. Consider adding a mezzanine level for additional storage or a compact office loft accessed via a space‑saving spiral staircase.
Moreover, incorporate bi‑fold or sliding glass doors on one side to create an open‑air feel while maintaining security when closed.
Therefore, a glass façade can showcase finished work, attract customers, and provide abundant natural light for detailed tasks.
In addition, install a retractable awning or canopy outside the container to create a shaded work‑area for painting or assembly that benefits from fresh air.
Consequently, you expand usable space without altering the container’s structural envelope.
Furthermore, think about integrating renewable energy: mount solar panels on the roof to power lighting and low‑draw tools, reducing reliance on the grid.
Moreover, pair solar with a battery bank to maintain operation during cloudy days or grid outages.
Therefore, a hybrid power system enhances sustainability and can qualify for green building incentives.
In addition, incorporate smart technology: Wi‑Fi‑enabled thermostats, motion‑sensor lighting, and remote‑monitored security cameras.
Moreover, use a tablet or smartphone app to control outlets, check temperature, and receive alerts for unauthorized entry.
As a result, your workshop becomes a modern, connected hub that improves efficiency and peace of mind.
Maintenance and Longevity
Furthermore, regular maintenance preserves the container’s structural integrity and ensures the workshop remains safe and productive over decades. Establish a quarterly inspection routine that focuses on the roof, seals, and drainage.
Moreover, clear debris from gutters and roof scuppers to prevent water ponding, which accelerates corrosion.
Therefore, touch up any scratches or chips in the exterior paint with a rust‑inhibiting primer and matching topcoat.
In addition, lubricate door hinges, latch mechanisms, and any moving parts of installed equipment to prevent wear.
Consequently, smooth operation reduces strain on components and extends service life.
Furthermore, inspect insulation for signs of compression, moisture intrusion, or pest damage; replace compromised sections promptly.
Moreover, check electrical connections for tightness and signs of overheating, especially at high‑load breakers.
Therefore, test GFCI outlets monthly and replace any that fail to trip.
In addition, service the HVAC system according to the manufacturer’s schedule—clean filters, check refrigerant levels, and inspect coils.
Consequently, optimal climate control performance protects both comfort and equipment longevity.
Furthermore, maintain a clean workspace by sweeping floors, wiping down surfaces, and organizing tools after each project.
Moreover, implement a shadow‑board system for hand tools so that missing items are immediately noticeable.
As a result, tidiness reduces accident risk and improves workflow efficiency.
Real‑World Case Studies
Furthermore, examining successful implementations provides practical insights and inspiration for your own Container Workshop Plans. Below are three diverse examples that highlight different approaches and outcomes.
Moreover, Case Study 1 – Urban Woodworking Studio: A designer in Portland converted a 40‑foot high‑cube container into a 320‑square‑foot studio featuring sound‑deadening panels, a dust collection system, and a finished hardwood floor.
Therefore, the total project cost was $22,000, including permits, insulation, and custom cabinetry, and the studio now generates $6,000 monthly in custom furniture sales.
In addition, the owner reports a 30 % increase in productivity due to the dedicated, climate‑controlled environment.
Consequently, the studio has expanded to a second container for finishing and shipping.
Furthermore, Case Study 2 – Mobile Metal Fabrication Unit: A welding contractor in Texas built a 20‑foot container workshop equipped with a three‑phase power inlet, a 220‑amp welder, and a retractable awning for outdoor work.
Moreover, the unit can be towed to job sites, reducing setup time from two days to under four hours.
Therefore, the contractor secured three additional contracts worth $45,000 in the first six months after deployment.
In addition, fuel savings from reduced travel and lower equipment rental costs improved net profit by 18 %.
Consequently, the mobile workshop has become a core asset of the business.
Furthermore, Case Study 3 – Artist‑Residency Container Collective: A nonprofit in Brooklyn repurposed four containers into a shared workspace for painters, sculptors, and digital artists.
Moreover, each unit features individualized climate control, adjustable lighting, and a communal gallery space made from the container’s side doors.
Therefore, the collective offers affordable studios at $400 per month, attracting over 30 resident artists in its first year.
In addition, workshop‑style classes and open‑studio events generate supplementary revenue that supports programming costs.
As a result, the project demonstrates how container workshops can foster community and cultural vitality.
Future Trends in Container Workshops
Furthermore, the evolution of container‑based workspaces continues to accelerate as technology, materials, and design philosophies advance. Staying informed about emerging trends helps you future‑proof your Container Workshop Plans and maintain a competitive edge.
Moreover, Trend 1 – Hyper‑Modular Systems: Manufacturers are developing standardized interface frames that allow containers to be clicked together like LEGO bricks, enabling rapid reconfiguration and expansion without welding.
Therefore, workshops can grow or shrink in response to seasonal demand, optimizing space utilization and cost.
In addition, Trend 2 – Advanced Composite Panels: New lightweight, high‑R‑value panels made from aerogel‑infused polymers offer superior insulation with minimal thickness, preserving interior volume.
Moreover, these panels resist moisture and mold, reducing maintenance burdens.
As a result, builders can achieve passive‑house‑level performance inside a container footprint.
Furthermore, Trend 3 – Integrated Smart Grids: Pilot projects connect multiple container workshops to a local micro‑grid powered by solar arrays and battery storage.
Moreover, energy management software allocates power based on real‑time demand, reducing waste and lowering utility bills.
Therefore, participating workshops may earn credits for excess generation, creating a potential revenue stream.
In addition, Trend 4 – Biophilic Design: Incorporating living walls, natural wood accents, and large windows improves occupant wellbeing and creativity.
Moreover, studies show that access to greenery and daylight can increase productivity by up to 15 %.
Therefore, future container workshops may blend industrial robustness with organic aesthetics to create inspiring environments.
Consequently, by embracing these trends, you ensure your workshop remains relevant, efficient, and enjoyable for years to come.
What are the primary advantages of using Container Workshop Plans over traditional stick‑built workshops?
Furthermore, Container Workshop Plans deliver superior structural strength, portability, and faster build times compared to conventional wood or steel framing. Moreover, the modular nature allows easy expansion or relocation, which is ideal for businesses that need to adapt quickly. Consequently, owners benefit from lower foundation costs, reduced material waste, and a durable steel shell that resists pests, fire, and extreme weather.
How much does it typically cost to convert a shipping container into a functional workshop using Container Workshop Plans?
Furthermore, costs vary widely based on size, location, and finish level, but a basic conversion of a 20‑foot container typically ranges from $10,000 to $18,000, while a 40‑foot high‑cube unit with insulation, electrical, plumbing, and premium finishes can reach $25,000 to $40,000. Moreover, factors such as foundation type, permit fees, and custom features (e.g., mezzanines, solar panels) influence the final budget. Therefore, obtaining detailed quotes and allocating a 10‑15 % contingency helps avoid unexpected overruns.
Do I need a building permit to install a workshop built from Container Workshop Plans?
Furthermore, most jurisdictions require a permit for any permanent or semi‑permanent structure, including container‑based workshops. Moreover, the specific permit type—accessory structure, temporary building, or change‑of‑use—depends on local zoning and the intended use (e.g., residential hobby vs. commercial fabrication). Therefore, contacting your municipal building department early and submitting complete Container Workshop Plans with structural calculations, site plans, and utility schematics is essential to ensure compliance and avoid costly delays.
What insulation options work best for maintaining a comfortable temperature in a container workshop?
Furthermore, spray foam insulation provides excellent air sealing and high R‑value per inch, making it ideal for the irregular contours of a container’s interior. Moreover, rigid foam boards (polyisocyanurate or extruded polystyrene) offer consistent performance and are easier to install DIY, especially for walls and ceilings. Therefore, a combination—spray foam for sealing gaps and rigid board for flat surfaces—delivers optimal thermal efficiency while controlling moisture and reducing the risk of condensation.
Can I install solar panels on the roof of a container workshop built from Container Workshop Plans?
Furthermore, the flat, sturdy roof of a shipping container is an excellent platform for mounting solar panels. Moreover, using a low‑profile racking system minimizes wind load and preserves the container’s integrity. Therefore, a typical 2‑kW to 4‑kW array can power lighting, outlets, and low‑draw tools, while excess energy can be stored in batteries or fed back to the grid, depending on local utility policies. Consequently, integrating solar enhances sustainability and can reduce operating costs over the workshop’s lifespan.
Ready to Build Your Dream Workshop?
Furthermore, take the first step toward a versatile, portable workspace that grows with your ambitions. Moreover, our expert team can help you refine your Container Workshop Plans, secure permits, and source quality materials.
Therefore, click the button below to schedule a free consultation and receive a customized project estimate today.
Furthermore, by following the detailed guidance presented throughout this article, you now possess a comprehensive roadmap to transform a simple shipping container into a highly functional, inspiring workshop. Moreover, each phase—from initial concept and budgeting to final finishes and maintenance—has been broken down into actionable steps that ensure clarity and confidence.
Therefore, whether you are a seasoned fabricator seeking a mobile solution, a hobbyist craving a dedicated creative haven, or an entrepreneur aiming to launch a makerspace, Container Workshop Plans offer a scalable, cost‑effective pathway to achieve your goals.
In addition, remember to revisit local regulations, invest in quality insulation and electrical work, and prioritize safety features to protect both yourself and your investment.
As a result, you will enjoy a durable, efficient workspace that serves your craft for many years to come.
